Deconstructing the Japanese Sword - Terminology and Dissassembly

People are often intimidated by Japanese Swords. Why? Well they are legitimately believed to be among the most sophisticated and beautiful weapons made in the pre-modern world, and there’s a long and complex tradition and history that comes along with the physical object. There’s also a good amount of mythologization, misinformation, and exaggeration out there about Japanese swords.
The Japanese sword can be viewed as an art object, a symbol of Japanese cultural traditions, or as a sort of totem of the warrior ethos. Either way, every aspect of it’s design evolved for extremely practical utilitarian reasons, just like any other weapon or tool. A true appreciation of the Japanese sword shoul start with the practical. We’re going to show the major parts of this revered sword, it’s furniture, terminology, and give some brief explanations on why the Japanese sword is designed the way it is. We’ll also show you how to dissassemble the sword for maintenance.

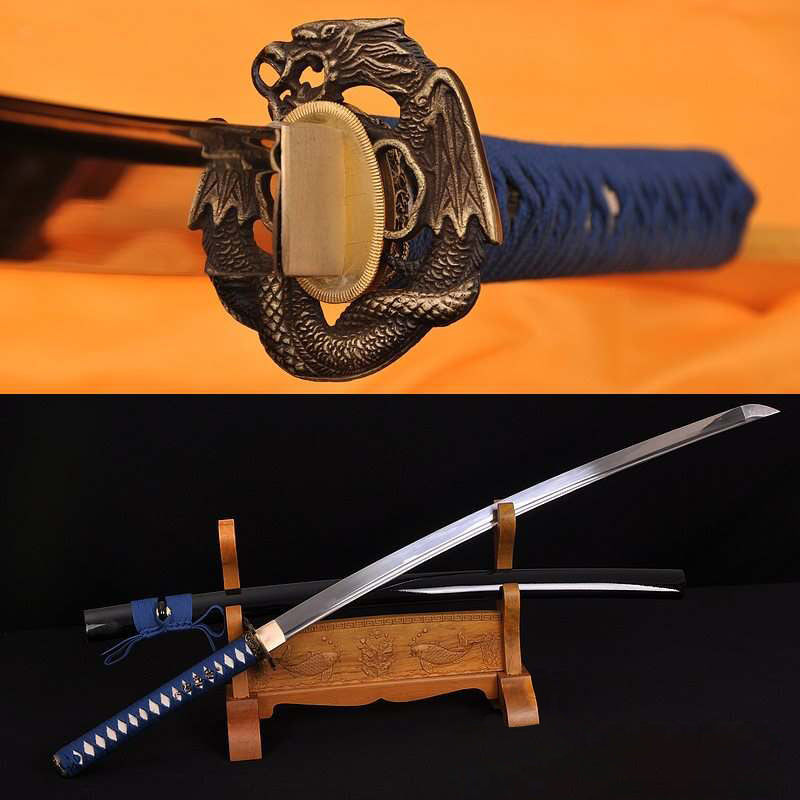
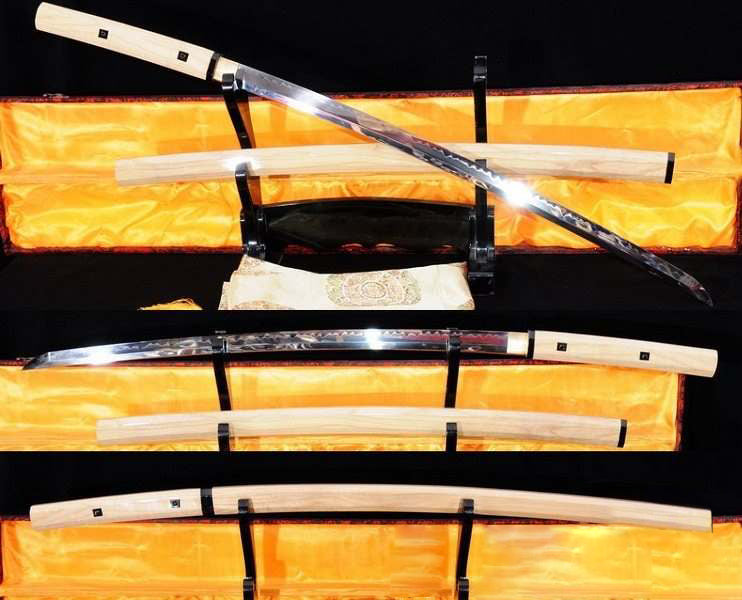
Tachi Sword
The katana evolved from the older tachi, a deeply curved sword which hung loosely from a cord sling wrapped around the waist. The samurai were originally horsed archers so the tachi was made to be employed from horseback. But over time, the samurai took on more of an infantry role. The mounting system of the sword was simplified for foot soldiers and it was made with less of a curve so you could easily draw it from the scabbard and cut in one single motion. The katana is instead stuck into the samurai’s belt, a sash known as obi, where it rides much more conveniently while on foot.

Obi (Belt)
The scabbard, known as the saya, is made from lightweight wood with a lacquered coating which protects the wood and the blade from moisture.

Saya (Scabbard)
There is also a protruding knob near the mouth of the saya which is called a kurikata. A long cord known as the sageo fits through the eyelet in the kurikata and is wrapped around the belt to keep the sword from slipping out of the obi; again a simple, practical purpose.

Kurikata and Sageo
Traditionally, the saya has a mouth fitting made from water buffalo horn. This is known as the koiguchi. Some also have a matching fitting at the bottom known as the kojiri, which increases the durability of the saya and can even aid in using it as a striking weapon, a technique taught in some Japanese fighting systems.

Koiguchi and Kojiri
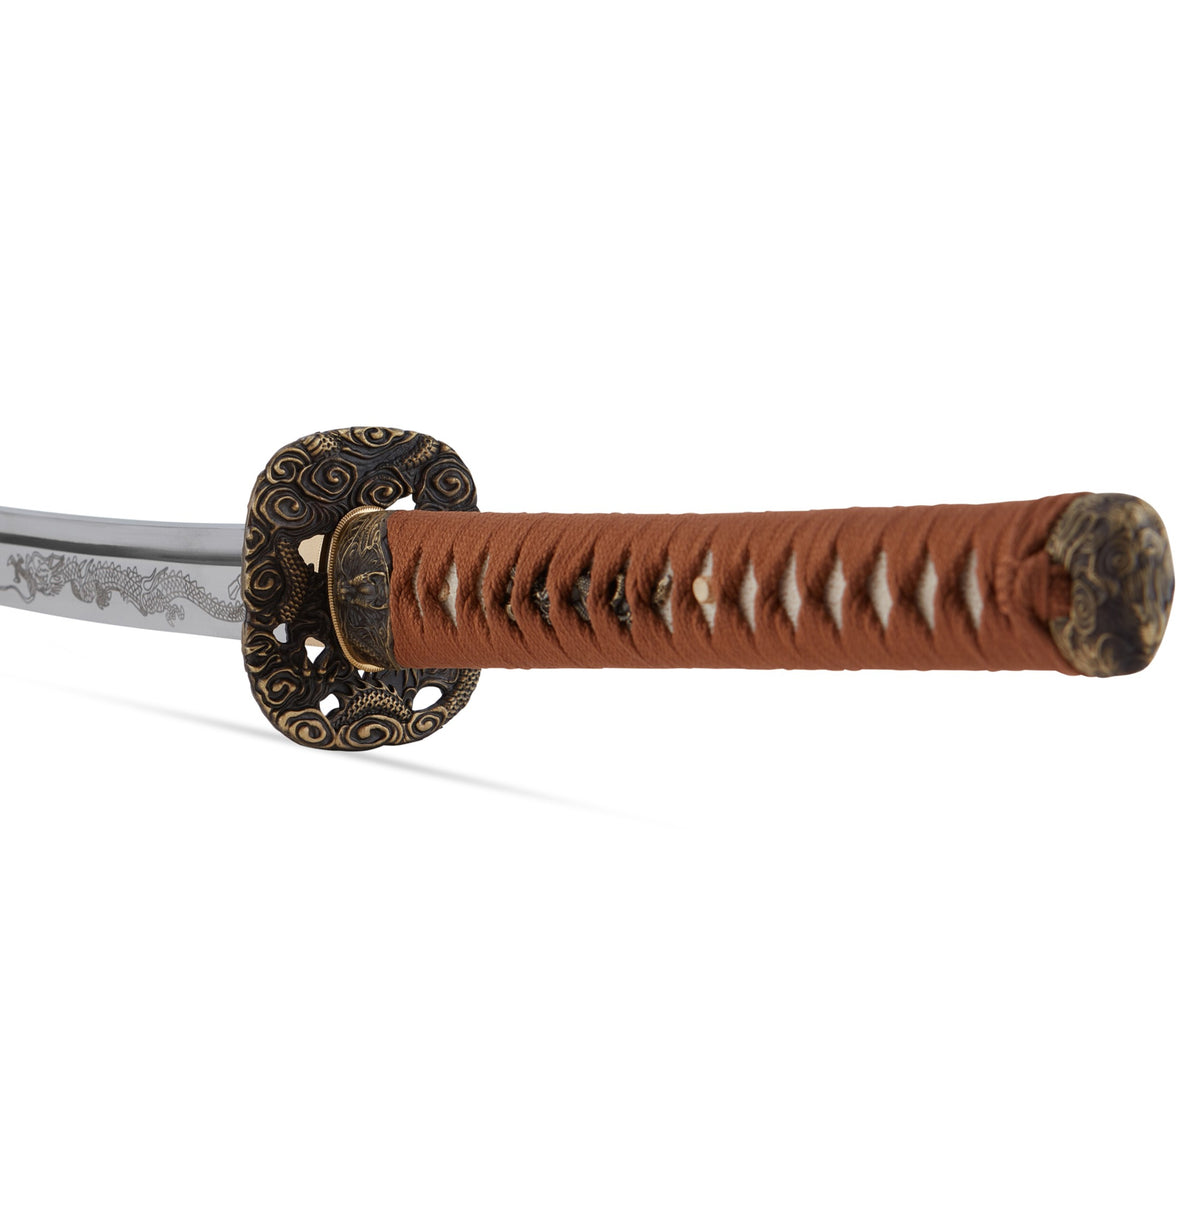
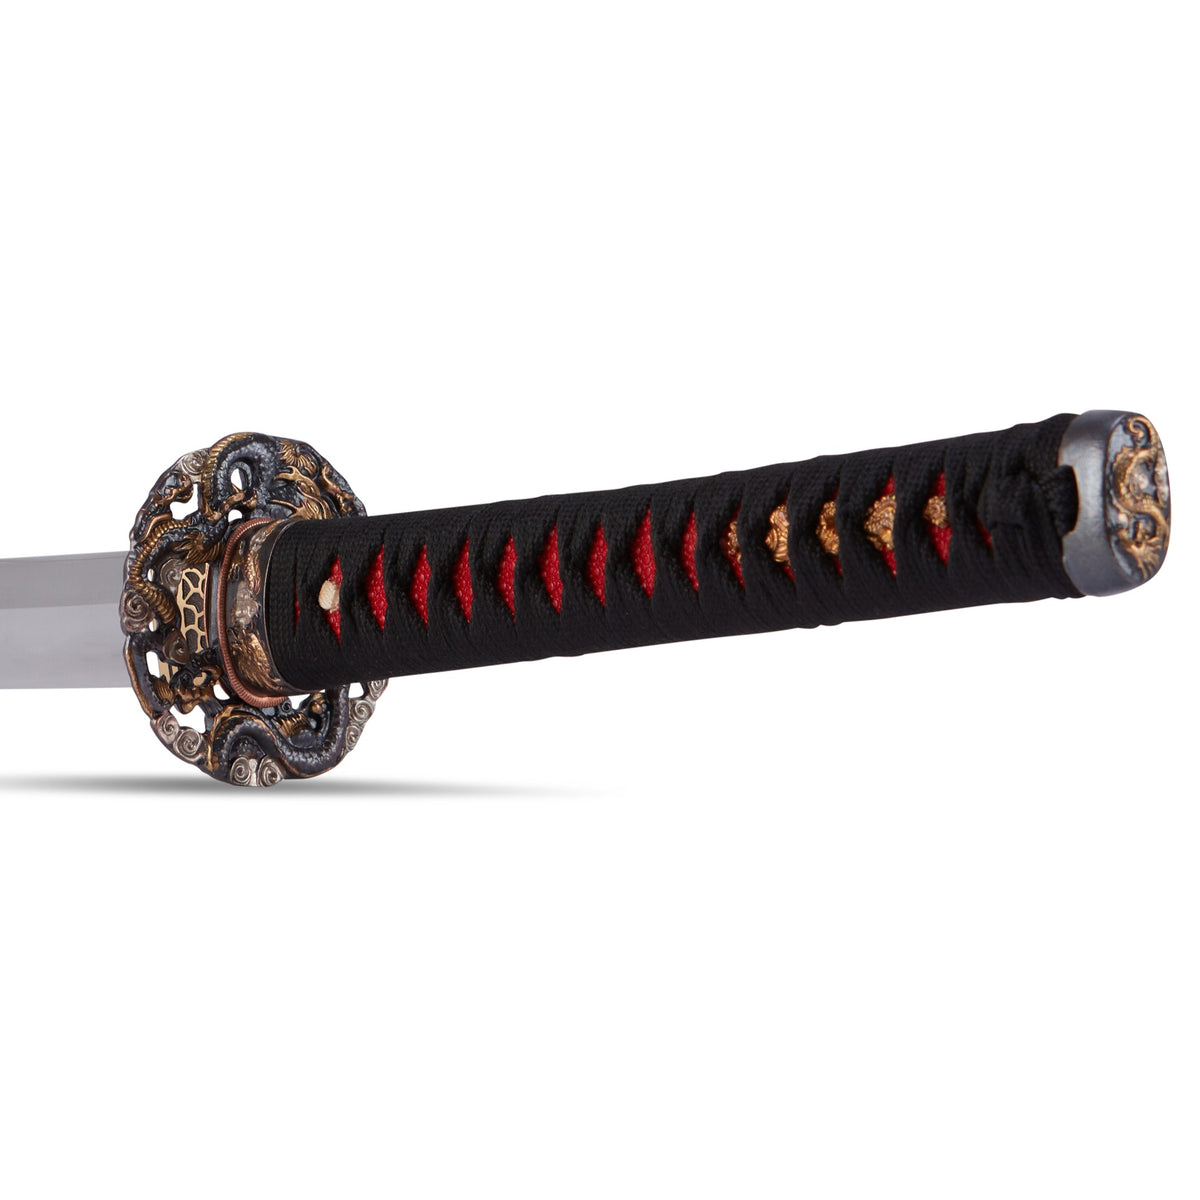
All of the mountings, or furniture, which are generically referred to as koshirae, are removable. This reflected the value and durability of the blade itself, which might be handed down from generation to generation, long past the time when the materials used to make the handle and scabbard would have worn away. The handle, known as the tsuka, sometimes pronounced ‘ska’, consists of a wooden core wrapped with manta ray skin, which is in turn wrapped with silk braid or in some cases leather. The principle here is the same as modern composites like carbon-fiber. You’re uniting the rigidity and compressive strength of wood to the amazing, tensile strength and toughness of manta ray skin. At the ends of the tsuka are two fittings, generally made from copper or copper alloys, known as the fuchi (the collar on the blade end), and the kashira (the butt cap). Traditionally, these were made as a pair. They serve to strengthen the handle, both protecting it from impact, helping secure the blade rigidly to the handle, and keeping the handle from tearing apart under the extreme forces generated during cutting. There are also two decorative fittings which fit under the braids on each side of the handle, known as the menuki. While mostly ornamental, they also can serve to help with the grip of the handle since they are positioned under your palms when holding the sword.

Koshirae
The whole handle unit is held onto the tang of the blade with one or two small tapered pegs known as mekugi, which fit through a hole in the tang known as mekugi-ana. Traditionally, this peg was made from bamboo. There are small brass tools made specifically for removing them, called mekugi-nuki, though other small blunt objects can be used as well. Pop the mekugi out and the whole tsuka will slide off the tang of the blade. When taking the blade apart, if everything is nice and tight, the tsuka will be fairly hard to remove. So hold it in your left hand, give your wrist a good smack with your right fist, and the whole thing will generally come free.


Bamboo Mekugi Peg
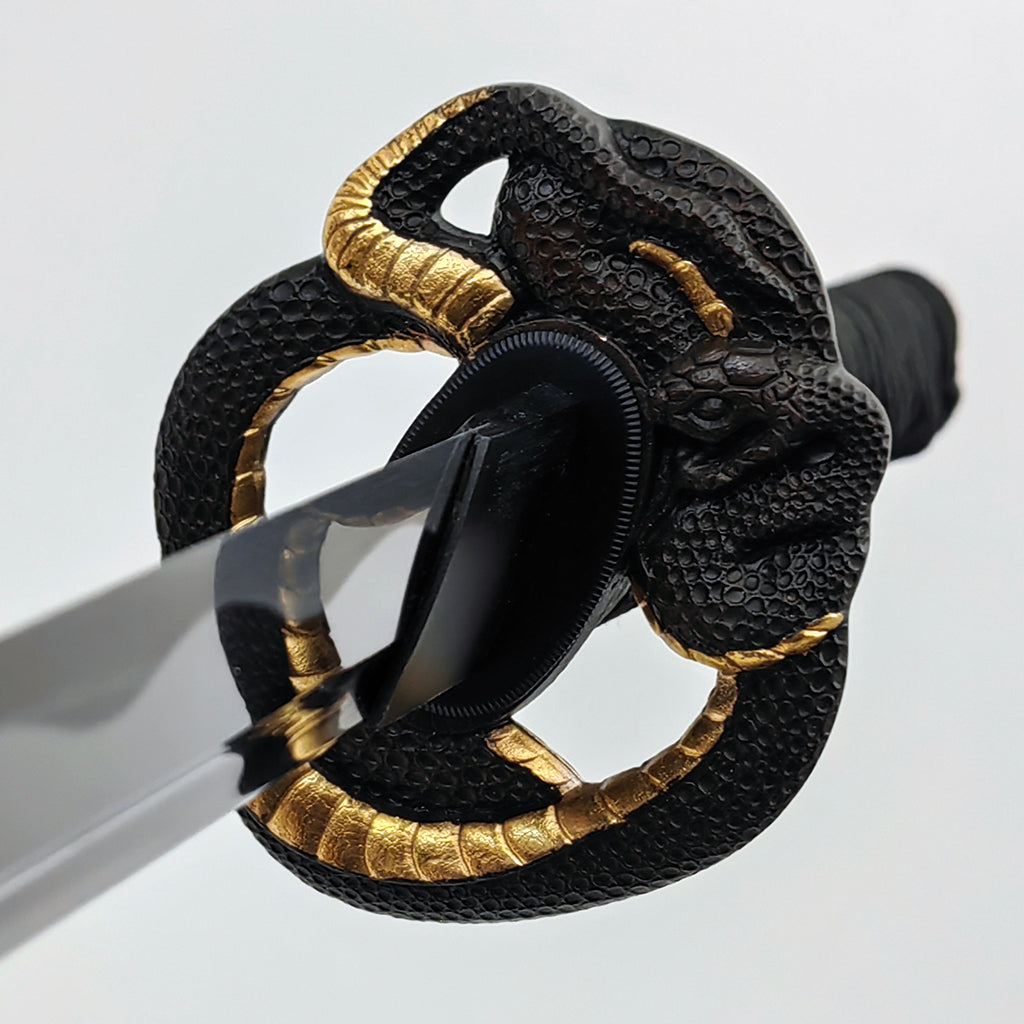
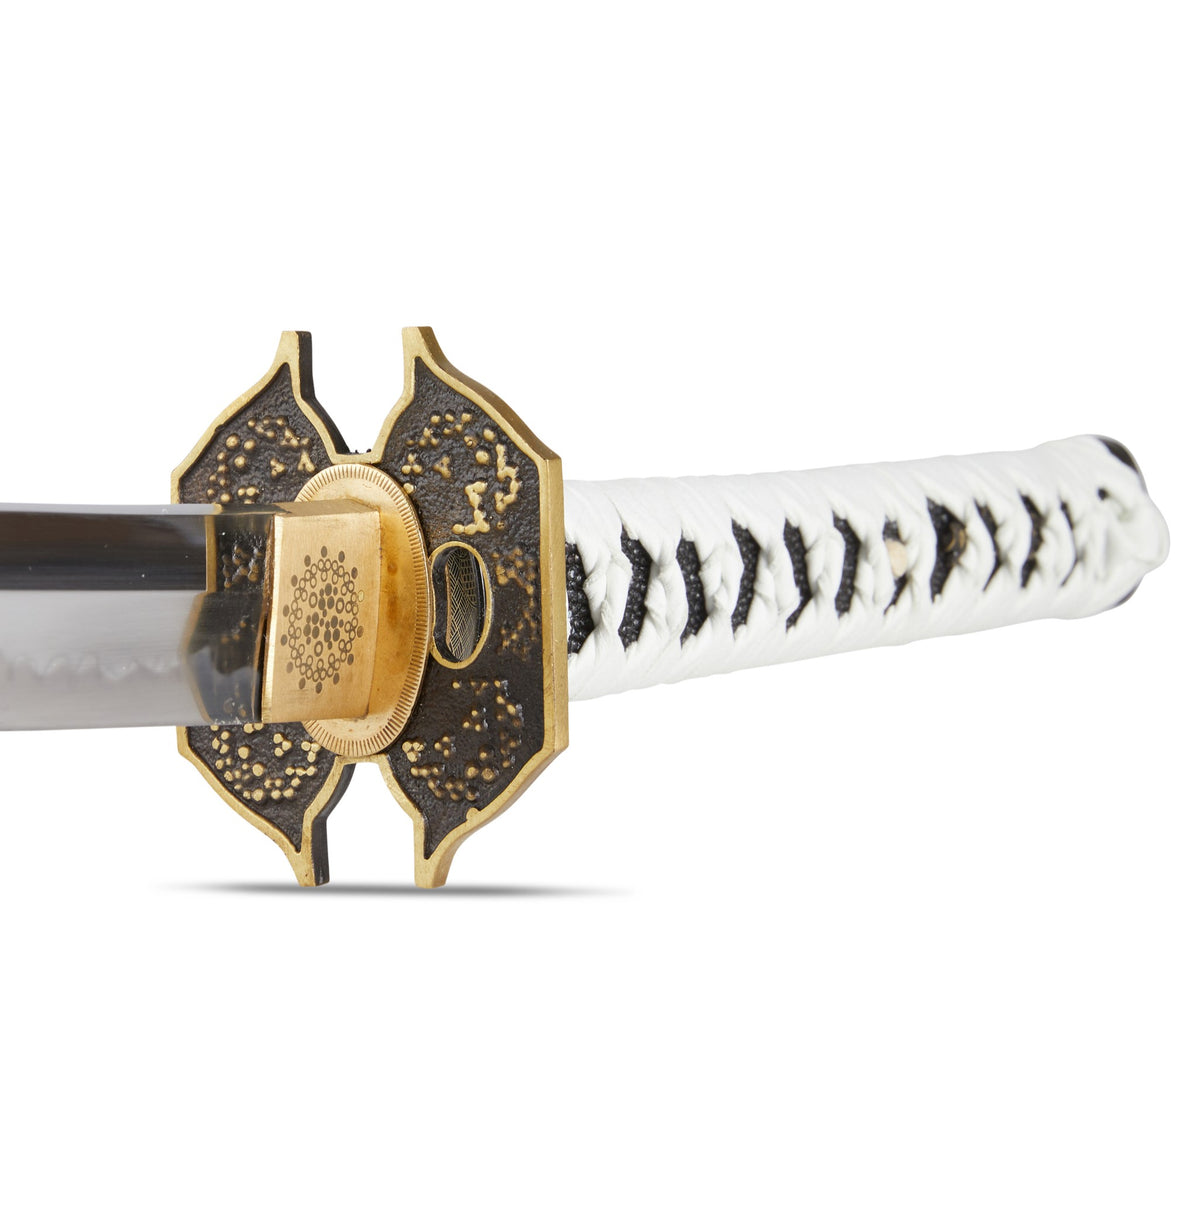
Between the tsuka and the blade is the hand guard, or tsuba. Like all the fittings of the sword, these were made by specialist craftsmen, and in some cases, enormous energy and artistry was put into their manufacture. At the end of the day though, their basic purpose was simply to guard the swordsman’s hand from both his own blade and the enemy’s alike. The tsuba nests between two washers known as seppa. An important thing to understand about the handle system of a Japanese sword is that it’s subject to wear. As that wear progresses, the tsuba gets loose and can start to rattle. So seppa are not only washers which keep the tsuba from getting scratched or dented by the corners of the sword, but they’re also shims which allow you to adjust the tightness of the fit between the tsuka and the blade. Seppa can be taken off the blade and replaced with thicker ones, or additional thinner seppa can be added to re-adjust the fit of the handle.


Tsuba and Seppa
When you remove the tsuka, what’s left is the blade itself and a square metal fitting called a habaki, usually made from copper or copper alloys. The habaki acts as a sort of shock absorber and bushing, distributing the extreme forces to which the blade is subjected so that they aren’t concentrated in only one or two points of contact between the blade and the guard. Without the habaki, the guard or the seppa would quickly develop dents which could lead to looseness and possibly even failure of the handle. The overall engineering of the Japanese blade evolved in such a manner that nearly every part of the system has several ingeniously interlocking purposes and the habaki is no different. Not only does it connect the blade to the handle, but it also serves as a sleeve which is just the right thickness so as to lock the scabbard in place when the sword is sheathed. When properly adjusted, this seals the atmosphere of the scabbard so that moisture doesn’t get on to the blade and also keeps the sword from accidentally flying out of the scabbard.

Habaki
So now the preliminaries are over and we get to the heart of the matter, the blade itself. All Japanese blades consist of a tang or nakago which is roughly filed to provide a friction-fit for the tsuka, and the blade itself which is meticulously polished. The dividing line between the two is defined by two little notches known as machi, which the habaki rests on; mune-machi on the spine side, and ha-machi on the cutting edge side. So, what makes a katana.. a katana? Basically, length. Katana are traditionally designated as any sword over two shaku of blade length. A shaku equates to about 12 inches. And blades between 1 and 2 shaku, 12” to 24”, are known as wakizashi. Anything under that, below about 12”, is called a tanto. Before we talk about the business end of the blade, let’s discuss the tang

The tang of a Japanese sword is never polished or cleaned in any way. Over the centuries, the nakago develops a patina which changes over time and is an important part of the evaluation process of older blades. If you have a genuine Japanese blade, never ever clean this part of the blade. Chiseled into the tang by the maker is the mei, or signature. Mei could be quite extensive and cover both sides of the blade, or quite simple depending on the smith. Sometimes the signature is only a character or two, indicating the name of the smith or the school he was part of. In other cases, the mei includes dates, testing information, the name of the customer for whom the blade was made, or what particular event it was made for.

Nakago (Tang)
The characteristic aspect of the Japanese sword is it’s curvature. This is referred to as the sori. One of the first things you’ll notice when inspecting a Japanese sword is the wavy line running down the blade. That’s a visual marker which shows where the hardened portion of the blade divides from the unhardened portion. There’s a lot of misconceptions about this. Japanese swords traditionally have two separate types of forge welding operations, one of which involves inserting a softer steel core into a harder steel jacket. This has nothing whatsoever to do with the hamon. The hamon is created by heat treating, not as a result of any forging operations. The smith starts by painting a special clay mixture onto the spine, next the blade is heated to 1500 Fahrenheit, and then the blade is quickly quenched in water. When quenched, the clay-coated spine cools slower than the unprotected cutting edge, resulting in differential hardening. These different microscopic structures refract light differently when carefully polished, and that results in something you can perceive with the naked eye, the hamon. In modern metallurgical terms, the edge is formed of a harder martensitic structure, whereas the spine is formed of pearlite and ferrite.

Hamon (Temper Line)
The most common style of Japanese sword is known as Shinogi-Zukuri, meaning that it has a defined and counter-polished tip, and a ridge running down the side of the blade. This increases the blade’s strength to weight ratio, making it stronger when cutting armored targets. Other Japanese swords, and particularly shorter blades like the tanto are often seen with no bevel, similar to a chef’s knife. This style is known as Hira-Zukuri. As we mentioned, the typical Japanese blade has a single cutting edge. This is known as the ha. The spine is known as the mune, the tip is called the kissaki, and the blade ridge is the shinogi.

Japanese swords were made from steel which was repeatedly hammered flat and folded on to itself repeatedly, up to 12-15 times or more. This was done for practical reasons, because the steel as it came out of the furnace was full of voids and impurities. Folding the steel homogenized the carbon content making the blade metallurgically consistent from one end to the other. The side result of this process was a sort of wood grain pattern created in the steel. This grain pattern effect is known as hada. Connoisseurs obsess over the aesthetic qualities of the hada, but it should never be forgotten that at the end of the day hada is a side result of the process smiths used in trying to make an effective cutting tool out of very primitive material.

The Japanese sword is a wonderfully efficient and effective piece of design. It works in a very logical and simple way, and there’s no reason for anybody to be scared off by all the hype and mythology surrounding it. The Japanese sword speaks for itself. The more you learn about it’s history, traditions, and manufacture, the richer your understanding, but still the sword speaks for itself. Anybody can look at a Japanese sword and find something to appreciate.

Best Sellers
- Regular Price
- from $199.99
- Sale Price
- from $199.99
- Regular Price
-
- Unit Price
- per

- Regular Price
- from $319.00
- Sale Price
- from $319.00
- Regular Price
-
- Unit Price
- per
- Regular Price
- from $219.00
- Sale Price
- from $219.00
- Regular Price
-
$0.00
- Unit Price
- per
- Regular Price
- from $649.00
- Sale Price
- from $649.00
- Regular Price
-
- Unit Price
- per
- Regular Price
- from $339.00
- Sale Price
- from $339.00
- Regular Price
-
- Unit Price
- per

- Regular Price
- from $269.00
- Sale Price
- from $269.00
- Regular Price
-
- Unit Price
- per
- Regular Price
- from $239.00
- Sale Price
- from $239.00
- Regular Price
-
- Unit Price
- per
- Regular Price
- from $539.00
- Sale Price
- from $539.00
- Regular Price
-
- Unit Price
- per
- Regular Price
- from $384.00
- Sale Price
- from $384.00
- Regular Price
-
- Unit Price
- per